Have you ever bitten into a homemade burger that was just… better? The secret usually isn’t the seasoning—it’s the grind.
Whether you are a hunter processing this season’s deer, a pet owner making raw dog food, or a home chef tired of mystery supermarket mince, owning an electric meat grinder is a game changer. But with options ranging from $100 to $1000+, how do you know which one won’t burn out on the first brisket?
This guide compares the top electric meat grinders of 2025, explains which parts actually matter, and answers the most common question we get: “Can I grind bones in this?”
Know Your Tools: The 3 Main Types of Meat Grinders
Not all grinders are created equal. Depending on how much meat you process (and how much elbow grease you want to use), here is how to choose between the three main styles.
Manual Meat Grinders:
These are the “old school” grinders your grandmother likely used. They clamp onto the edge of a countertop and use a hand crank to push meat through the blade.

- Pros: Very affordable ($20–$100), durable (fewer parts to break), and works without electricity.
- Cons: Extremely slow and physically demanding. If you have 50 lbs of deer meat, your arm will give out before the machine does. Countertop clamps can also slip or mar your table.
- Best For: Occasional use (1–2 lbs of burgers once a month) or off-grid living.
Electric Meat Grinders (Most Popular):

The standard for modern home kitchens and hunters. A motor drives the auger, allowing you to feed meat continuously.
- Best For: Hunters, pet owners, and families who want to grind meat weekly without the workout.
- Pros: Fast, consistent texture, and easy to use. High-quality models can handle soft bones for pet food.
- Cons: Louder than manual models; requires access to a power outlet.
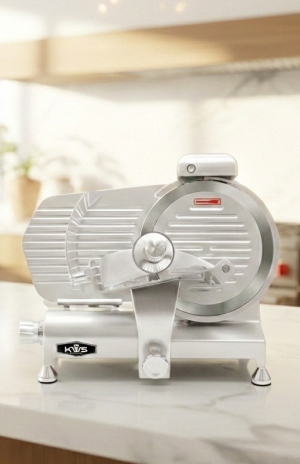
Horizontal Meat Grinders / Buffalo Choppers:
Often seen in commercial delis, these look very different. Instead of pushing meat through a tube (extrusion), a Buffalo Chopper uses a rotating bowl that passes meat under a spinning hood of blades.
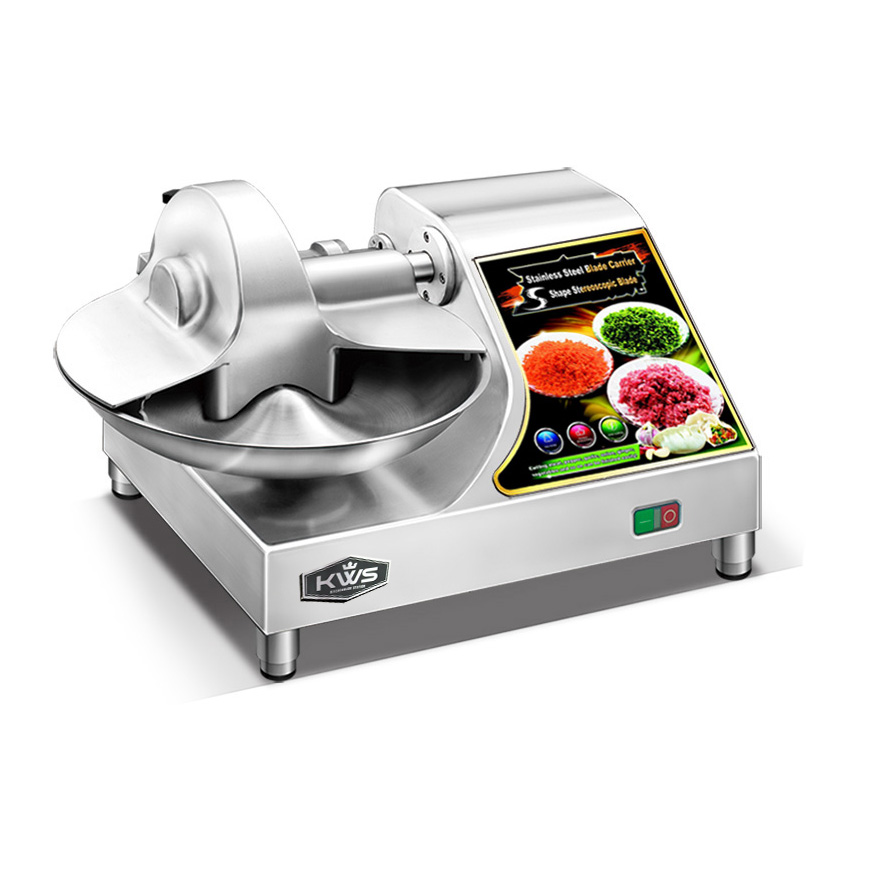
- Best For: Commercial kitchens, restaurants, or serious sausage-making hobbyists.
- Pros: Incredible volume. It chops rather than squishes, which preserves the meat’s moisture better than any other method. It is also excellent for vegetables and making “emulsified” sausages like hot dogs or bologna.
- Cons: Very expensive ($1,000+) and bulky. Overkill for most average homes.
🛠️ The 3 Parts That Make or Break a Grinder
Before you buy, check the build quality of these three specific components. Understanding these parts ensures you pick the right model for your workload and budget.
1. The Gears (Matching Gear Material to Your Grind Volume)
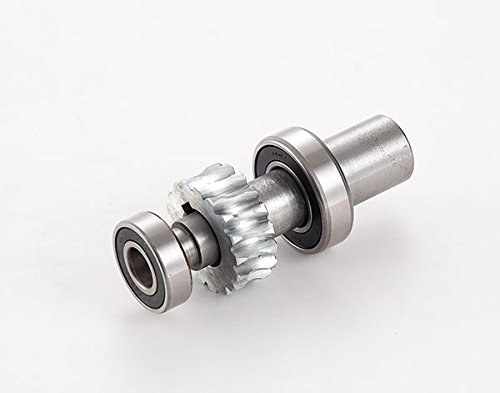
The gears transmit power from the motor to the auger and are the heart of the grinder’s durability. The choice between nylon and metal gears is less about “quality” and more about matching the machine to your expected volume and budget.
🎓 The Expert Take: If you plan to grind occasionally for family meals, models with Nylon gears offer a fantastic value and are perfectly suited. If you are a hunter or need to run your machine for long periods, an All-Metal gear model provides the rugged dependability needed for high volume. It’s all about matching the tool to the job!
2. The Cutting Blade (Stainless Steel is Non-Negotiable)
Carbon steel stays sharp but rusts if you look at it wrong. The cutting blade works in tandem with the plate to slice the meat cleanly. A dull or rusty blade smears the meat instead of cutting it, leading to a mushy texture and potential jamming.
🎓 The Expert Take: Look for Stainless Steel cutting blades. They are rust-resistant, dishwasher-safe, and retain a sharp edge far better than carbon steel—especially after repeated cleaning.
Maintenance: Need a replacement blade? Shop our Grinder Attachments & Replacement Parts
3. The Auger (The “Screw”)
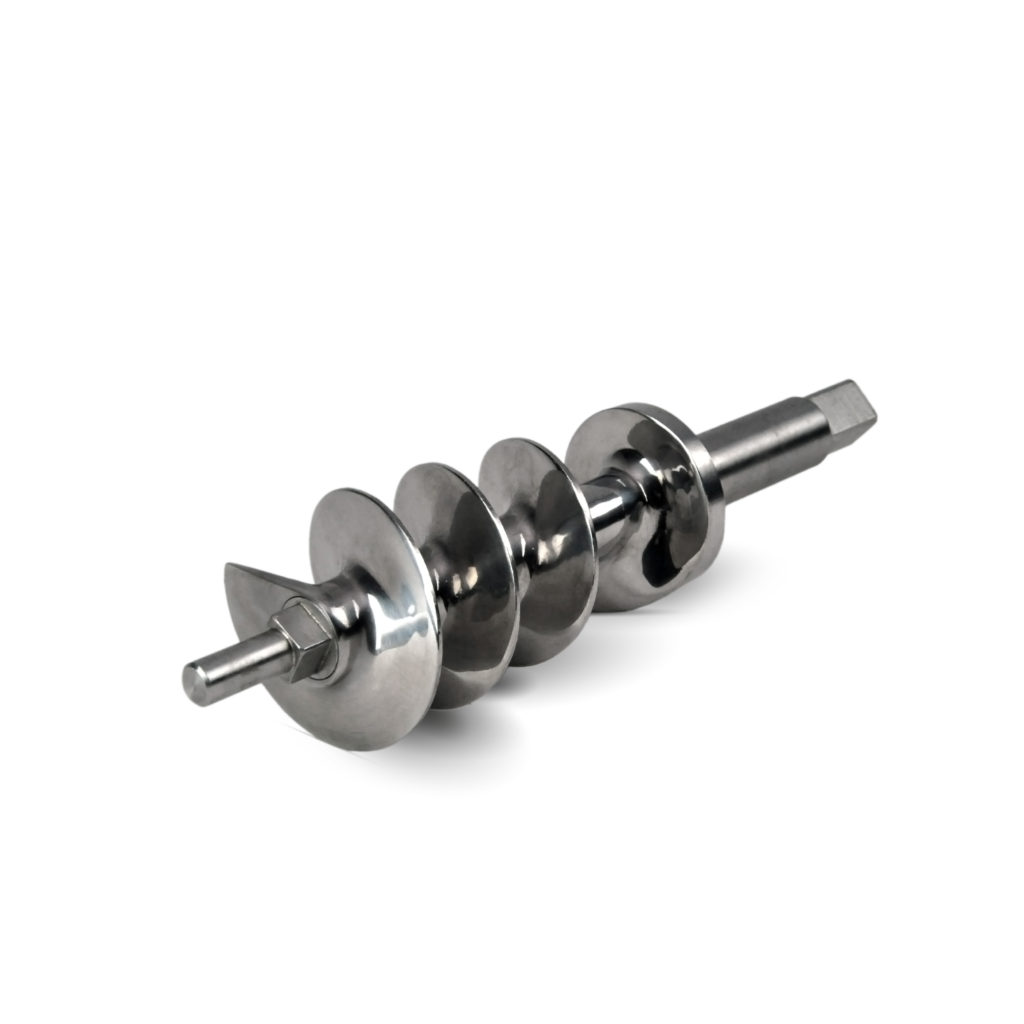
This is the spiral piece—commonly called the auger or worm—drives meat from the feed chute toward the cutting blade and through the plate. Under heavy operating pressure, any looseness in the auger will result in the meat “mushing” rather than grinding cleanly.
🎓 The Expert Take: Ensure the auger is made of heavy cast aluminum or preferably stainless steel, not a lightweight or thin alloy. A well-designed auger minimizes meat temperature increase and ensures a firm “bite” into the meat chunk.
“Can I Grind Bones for Pet Food?”
This is the #1 question we get from dog owners. The answer is YES, but be careful.
- Chicken Bones (Wings/Necks): Soft enough for most heavy-duty grinders (like the KWS TC-22 model grinder).
- Beef/Pork Bones: 🚫 DO NOT 🚫 put these in a standard home grinder. They will shatter the gears and void your warranty.
- The Golden Rule: If you can’t chop it with a heavy kitchen knife, your grinder can’t chew it either.
🔧 Expert Tips to Prevent Jamming
Nothing is more frustrating than a clogged grinder. Follow these 6 rules to keep the meat flowing:
1. The “Deep Freeze” Trick: Put your meat (and the grinder head including your grinding plates, knife and auger!) in the freezer for 30 minutes before grinding. Cold fat cuts cleanly; warm fat smears and clogs the plate.
2. Trim the Sinew: Remove the thick silver skin (connective tissue) from the meat. This is the “dental floss” that wraps around the auger and stops the motor.
3. Cut Meat Evenly & Feed Gently: Cut the meat into evenly sized chunks that fit easily into the feed funnel. Feed it through gently and consistently; don’t force or ram the meat down, as this overwhelms the motor and causes blockages.
4. A Sharp Cutting Knife is a Must: The cutting blade needs to be razor sharp to slice the meat against the plate. Replace dulled or chipped ones immediately for better performance and a cleaner, superior mince.
5. Don’t Overtighten the Grinder Head: Many users instinctively crank down the adjustment ring (the large screw ring at the end of the head) as tight as possible. This puts excessive pressure on the auger and the cutting knife, creating friction that can stop the motor or cause it to overheat. Hand-tighten it just enough to keep the plate steady.
6. Two-Pass Grinding: Never try to do a fine grind on the first pass. Run the meat through the Coarse Plate (10mm) first, then chill it again, and run it through the Fine Plate (4mm).
Beyond the Basics: Essential Grinder Parts and Attachments
While every grinder comes standard with a basic knife, plate, and auger, the true power of an electric meat grinder lies in its attachments. These accessories allow you to expand your kitchen repertoire far beyond just ground beef.
1. Grinding Plates (The Key to Texture)
Plates determine the final texture of your meat. They fit right in front of the cutting blade.
- Coarse Plates (6mm to 10mm): Essential for a first grind, chili, and chunky sausages. These plates require less effort from the motor.
- KWS Recommendation: Use this size for your first pass every time to prevent motor strain.
- Medium Plates (4.5mm to 6mm): The standard size for burgers, meatballs, and general-purpose mince.
- Fine Plates (3mm to 4.5mm): Used for patés, terrines, or emulsified sausages (like hot dogs or bologna).
2. Meat Stompers (The Safety Tool)
The stomper (or plunger) is designed to help push the meat down the feed tube and into the auger.
- Expert Safety Note: Always use the meat plunger provided with your machine. Never use your fingers, kitchen utensils, or anything that could damage the auger or cause serious injury. Your plunger is designed to fit the chute perfectly to prevent air pockets while keeping your hand safe.
3. Sausage Stuffing Tubes
This attachment replaces the cutting blade and plate. The meat passes directly through the auger and into the casing via a narrow tube.
- Sizes: Tubes range from narrow (hot dogs and breakfast sausage) to wide (bratwurst and Italian sausage).
- Tip for Stuffing: Never put the blade or plate back on when stuffing. The friction will heat the meat and cause the fat to render prematurely, leading to a dry sausage.
❓ Frequently Asked Questions
Q: My grinder is making a loud screeching noise. Is it broken? A: It likely needs lubrication. Food-grade silicone grease on the gears (if accessible) can fix friction noise.
Q: Can I use my dishwasher to clean the parts? A: Check the manual! Stainless steel plates are fine, but many augers and grinder heads are made of aluminum. Dishwasher detergent will oxidize aluminum, turning it gray and powdery. When in doubt, hand wash with hot soapy water.
🛒 Ready to Upgrade Your Kitchen Game?
Whether you are prepping for BBQ season or making custom pet blends, the right tool makes the job fun rather than a chore.
Not sure which size you need? Contact us today and we’ll help you pick the perfect model for your budget.
Brand Reputation and Warranty

A reputable brand and a solid warranty offer peace of mind. Research brands with a reputation for producing high-quality slicers known for their performance and durability. Check the warranty period offered by the manufacturer and spare part availability to ensure long-term reliability and customer support.
Moving from pre-packaged meat to grinding your own is one of the most rewarding upgrades a home cook can make. Whether you choose the value of the KWS SL-8 (light-duty grinder) for family meals or the raw power of the KWS TC-Series (heavy-duty grinder) for high-volume hunting, we have the perfect machine to fit your needs. Remember the key rules—keep the meat cold, feed gently, and match your grinder to your volume—and you’ll be enjoying superior texture and flavor every time.
To delve deeper into our product offerings and find the ideal electric meat grinders or buffalo choppers for your operation, contact us today. Our team is ready to assist you in selecting the perfect grinder that aligns with your needs and specifications. Let’s get you set up for success in your culinary endeavors!